Showing posts with label egg-free breakfast. Show all posts

Monday, August 24, 2020

"Everything-free" ~ "Buttermilk" Waffles (dairy-free + vegan + gluten-free)

 Happy National Waffle Day!


I celebrated by mixing up a batch of my "everything-free" waffles, and they were delicious! I am always tinkering with my recipes, aiming for the best possible texture and taste. This is a revised and updated version of the waffle recipe I shared before. 

These are crispy on the outside, moist and tender on the inside. My husband, who does not live gluten-free, enjoys them. They're not just "okay for gluten-free," but actually good, normal waffles. Enjoy!

"Buttermilk" Waffles  (vegan + gluten-free)

free of: dairy, eggs, gluten, soy, almonds, nightshades

Makes about twelve 3-4" waffle sections/ three batches in my waffle baker

*Make egg replacer ~ flax gel: 

Combine in a small saucepan~

1/3 cup water

1 teaspoon flax seeds

Bring to a boil; keep at a low boil for 1 minute. Strain gel into a bowl and let cool.

(the flax seeds can be saved & added to another meal, such as hot cereal or muffins, to boost nutrition)

*Make "buttermilk"

1 cup alternative milk (I use coconut milk- SoDelicious Unsweet Original coconut milk)

1 Tablespoon lemon juice  (doesn't need to be fresh- the bottled kind is fine)

Combine and let sit to curdle until needed


Dry ingredients: combine in large bowl and whisk thoroughly

2 cups gluten-free flour mix

~ I use 1 cup each of millet flour and arrowroot starch

3 Tablespoons coconut sugar

1 Tablespoon baking powder

3/4 teaspoon xanthan gum

1/2 teaspoon salt

(You can use another starch, like tapioca, but arrowroot seems to give a lighter texture)

(I'll be doing a post soon on different brands of millet flour and which I prefer)

Wet ingredients: combine in a small bowl

*the "buttermilk" mixture

*3 Tablespoons of the flax gel

1/3 cup neutral-flavored oil (such as canola or grapeseed)

1 1/2 teaspoons vanilla extract (optional, but yummy)

Stir or whisk to combine, then add to dry ingredients. Start mixing, then add:

1 teaspooon melted butter-flavored coconut oil

(If you add the coconut oil to the wet ingredients first, the cool milk will cause the oil to harden into little granules. It mixes in better if you add it after the milk is partly combined with the dry mixture.)

Continue whisking or stirring until well combined. You will be able to tell when the xanthan gum has been activated, as the batter will suddenly thicken. Let batter rest while the waffle iron heats.

Gluten-free batters are notorious for sticking, so I spray the waffle iron lightly with baking spray before every batch. Bake for 3-4 minutes, or until a nice golden brown. Remove to cooling rack, to keep them crisp. Store airtight in the refrigerator. I like to reheat mine in the toaster. The microwave doesn't revive the crisp like the toaster does. Use with 3-5 days.


Notes: 

-You can certainly use plain coconut oil, rather than butter-flavored. I just like the subtle flavor boost that the buttery kind gives. If you skip the coconut oil altogether, the waffles will tend to be more crunchy and hard, rather than crisp.

 -The xanthan gum is important. I know it's expensive to buy, but since you only use a tiny amount per recipe, it lasts a long time. Xanthan gum mimics gluten in baked goods, lending them structure. It is activated by motion and hydration. I whisk the dry ingredients together thoroughly, until I see the texture change. It's pretty interesting to see that shift. Once I add the liquid, I make sure to stir or whisk until the xanthan gum is further activated, and the batter thickens. You don't want to overmix, but that's  not as big an issue as it would be with gluten-bearing flours. Gluten-free flours are more forgiving.

-I use coconut sugar as part of my over-arching scheme toward lower-glycemic eating and fighting inflammation. Millet flour and arrowroot starch are resistant starches, and are supposed to be lower on the glycemic scale (meaning that they have a lesser impact on blood sugar levels). They are also, according to what I've read, non-inflammatory. Not that these waffles will not impact your blood-sugar at all, but the effect will be less than with standard flour and sugar. I rarely use any topping on them; just a bit of non-dairy butter substitute. They're so tasty that I rarely miss syrup. If I'm wanting that extra touch of sweetness, I'll drizzle them with a little bit of coconut nectar ~ also supposed to be lower on the glycemic scale, from what I've read.

-I use millet flour and arrowroot/tapioca starches...because they're the only ones my body will currently tolerate. Millet flour can be hard to find, but is often available from health food stores, and can be found online through Amazon. It's quite likely that other gluten-free flour blends would work well in this recipe, but I'm not able to test that theory as most of them contain things I can't tolerate. If you try a variation, I'd be interested to hear how it works out.


~ Thanks for stopping by and happy eating!


Wednesday, November 7, 2018

Old-school Everything-free Cinnamon Walnut Scones

I am so excited to be back! It has been more than four months since I posted one of my own recipes. My life has undergone profound change in those months, but by the grace of God, I'm still here. :) I have been working with a number of recipes recently, but with each one there was still something that was not quite right. This, though, was all I could hope for. I've just had a delicious breakfast, and could not wait to share it with my blog people. :)

Thank you for hanging in there with me, during my long hiatus.


The basis for this recipe is a biscuit recipe I've been working on. I can no longer use the stick margarine I've relied on for baking. I realized that it contains pea protein, which my body does not appreciate. I had tried various things to replace it, but was not getting the results I wanted. Then I had a small epiphany. Lard. My Granny Grace, who was renowned for her wonderful pies, preferred to use lard in her pie crusts. I wondered whether lard would make a positive difference in my biscuits, and it did! 

**for those who are vegetarian/vegan, this recipe can still work well, just by substituting a stick-margarine that works for you (such as Earth Balance soy-free buttery sticks, my old favorite).

I felt good about the idea of using lard, since people from many different places read this little blog. I believe that lard will be far more accessible to people in other countries than the specific margarine that I use. At first, I used lard from the grocery store, which worked well but had a long list of preservatives.  After doing some research online (my sister laughed when I told her I was searching for "healthy lard." Healthy is not an idea we usually associate with lard!) ...I found some good sources of lard that is from organically-fed, humanely-raised animals, and that has no mysterious chemicals added. It is much more expensive, of course, but I feel better about using it.

When we started trying to use foods and ingredients that are more healthful, we faced the dilemma of the high cost of better things. We decided to use those good things (like grass-fed beef) but to use less of them and eat them less often. We use the good beef, but we greatly reduced how often we eat it. I'll use the fancy, clean lard the same way. I'll buy the good stuff, but I'll be frugal in how often I bake with it.

The biscuit recipe has still needed tinkering, so I have not shared it yet.This morning, though, I used that recipe as my starting point and turned out some delicious scones.

Cinnamon Walnut Scones
(gluten-free, dairy-free, egg-free, soy-free, nightshade-free, low lectin)
Makes about eight 2 1/2" scones

Line your baking sheet with parchment paper, so it is ready when you need it.

Dry ingredients:
1 cup millet flour
1 cup tapioca starch
1 teaspoon coconut flour
2 teaspoons baking powder
1/2 teaspoon xanthan gum
1/2 teaspoon salt
1 teaspoon cinnamon
1/4 cup coconut "brown sugar"
----------
1/2 cup lard (or vegan margarine)
----------
2 teaspoons buttery coconut oil, melted
----------
2/3 cup coconut milk beverage
--------
1/2 cup chopped walnuts

Combine the dry ingredients in a mixing bowl and whisk together well. Cut in the lard (or margarine) with a pastry blender, or mix it in with your hands. With a fork, stir in the melted coconut oil. Add the coconut milk, and stir. When partway mixed, add the walnuts. Sir with the fork until just combined.

Dust a clean surface with a little millet flour. Scoop the dough onto the floured surface and gently gather into a ball. Pat the dough into a circle, about one inch thick. Using a 2 1/2" biscuit cutter, cut scones from the dough and place on the prepared baking sheet, leaving about two inches space between them. Gather up the scraps, gently combine, pat out, and cut more scones. Continue until all dough is used.

Preheat oven to 400 degrees Fahrenheit.
**Waiting until now to preheat the oven allows the cut scones to rest before baking.

When oven is preheated, bake scones for 18-20 minutes, until just cooked through.

Remove to a cooling rack.
(If left on the pan, the bottoms will keep baking and get too dark).

Enjoy!

Notes:
-I use Azure Standard unifine millet flour. If you are in the U.S. you may have access to an Azure drop location. It is a nationwide natural foods co-op. Their millet flour is more finely ground, and less gritty, than that in stores. If you can't get Azure flour, then something like Bob's Red Mill will work.
-That little bit of coconut flour is important for the texture. It really does make a difference.
-The same is true for the xanthan gum.
-Coconut "brown sugar." I found this in a store on a recent trip. The brand is Big Tree farms, and it is called "Organic Brown Coconut Sugar." Coconut Sugar is supposed to be "low-glycemic," having less impact on blood sugar than regular sugar does.
-The lard I found, through Amazon.com, is from a company called Fatworks.
-The buttery flavored coconut oil makes a difference in the flavor. If I did not have food issues, I would use butter as the fat in these. Using too much of the buttery coconut oil would give it an artificial flavor, like movie theater popcorn. This little bit makes a subtle, but important, difference.
-The coconut milk I used is SoDelicious brand, unsweetened original flavor. At some point, I will probably try the recipe using the thicker canned coconut milk. That would be more of a "cream scone."
-These scones should have a reduced impact on blood sugar (as opposed to regular scones, made with refined wheat flour and refined sugar). The flours are both resistant starches, and the sugar is low on the glycemic index.
-Someday, when life settles down, I will learn how to calculate the nutritional content of my baked goods, and will add that information to my posts. I will also learn how to include a print function for my recipes. I know how much I appreciate it when others make their recipes easy to print!
-I stick with fairly small batches in my baking, generally only using a total of about two cups of flour, for a couple of reasons. 1) alternative ingredients are generally expensive. It is more cost-effective to bake smaller batches 2) even with these better, more healthful substitutions, large amounts of baked goods are not ideal for any of us. :)
-It feels so good to be back in the kitchen, and back to sharing recipes! :)
- If you are interested in the rough journey my family and I have been on these past few months, I've shared it through my other blog:  https://thenourheartsbroke.blogspot.com/   If you just want to stop by and explore the recipes, then I am delighted that you are here. I hope you find things that work for you, that bring enjoyment to your life. :)


Saturday, May 12, 2018

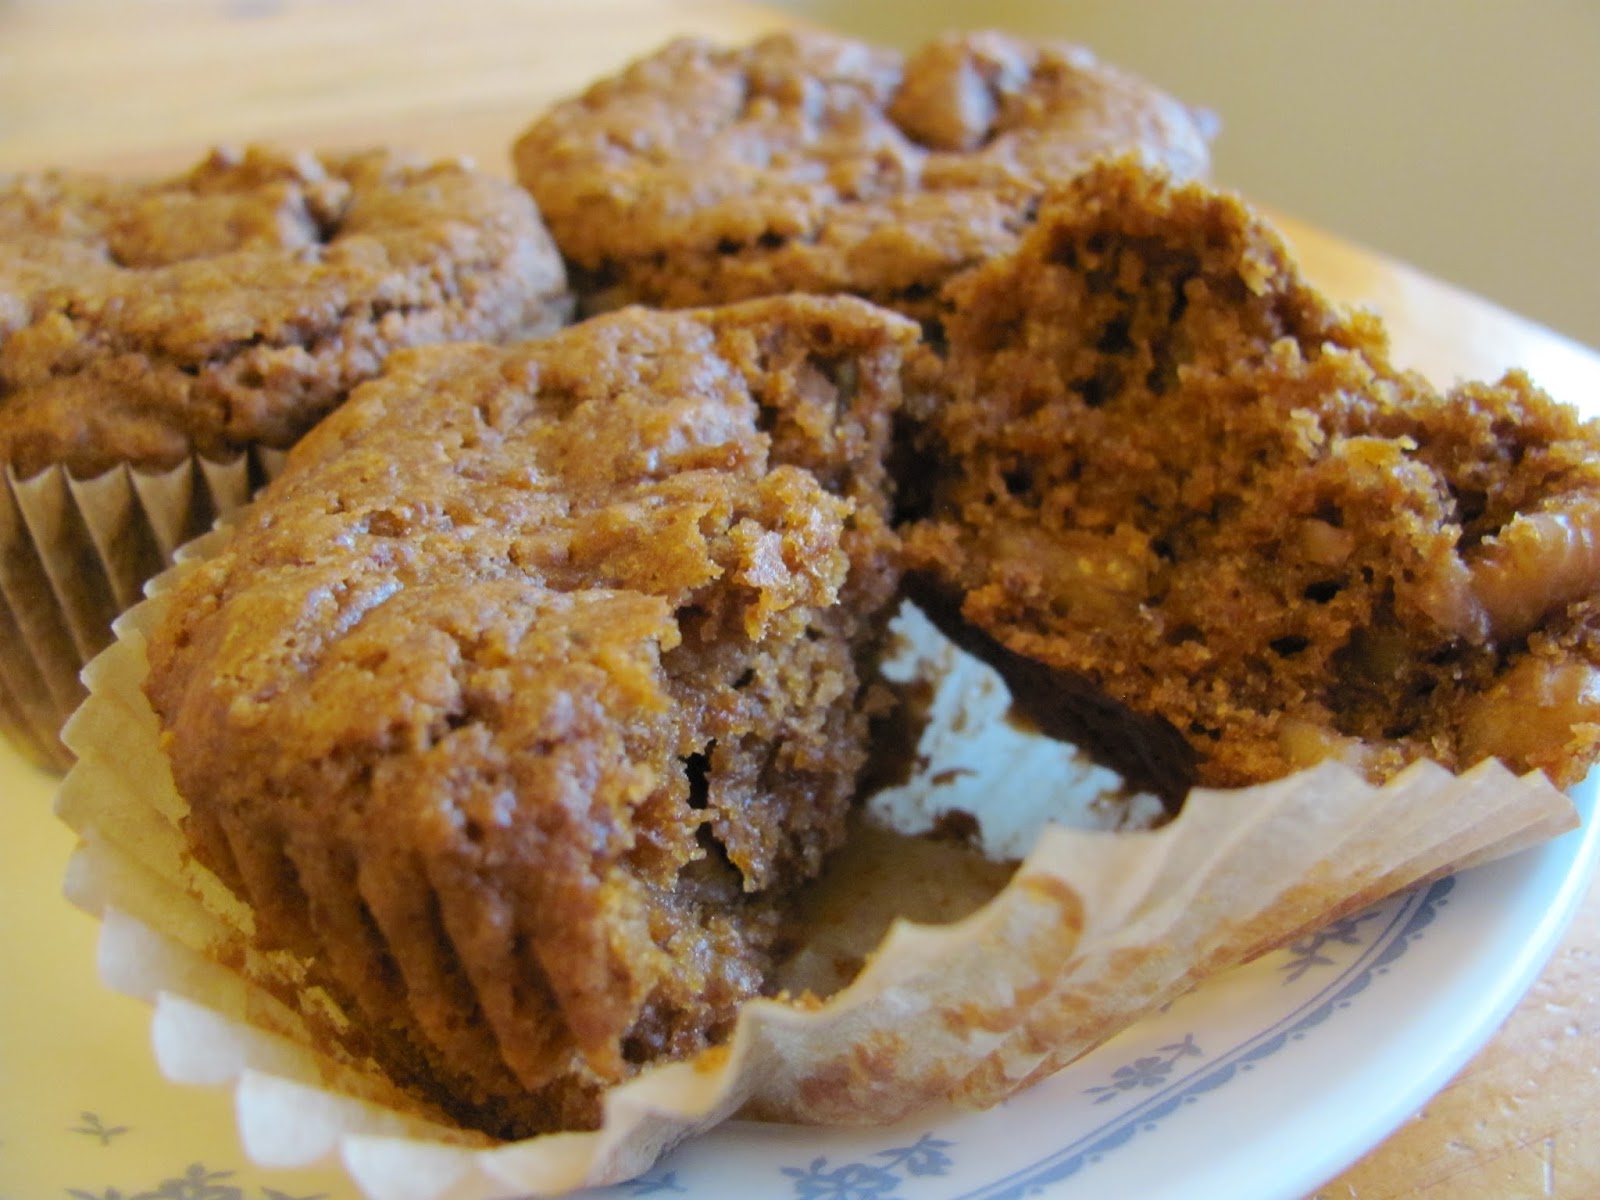
"Everything-free" Not-banana Muffins

"Everything-free" is our family's word for things that fit my food world. The list gets long- wheat-free, gluten-free, egg-free, dairy-free, soy-free, banana-free, almond-free, corn-free, potato-free, rice-free... Calling things "everything-free" just makes it simpler. :)

I have been working on my muffin recipes recently, trying to solve a problem. Since realizing that the butter substitute that I use has been bothering me, I have had to switch from a creamed solid fat method to using oil in muffins. The first result was that they all have a deep dip in the center. This is not a deal-breaker for eating them, but it does make them less attractive. To put a recipe out, without solving this issue, didn't feel right.

This specific recipe was born through a totally different experiment. I was making something else, and used coconut nectar as the sweetener. With the first bite, I thought, "This almost tastes like banana." The creative part of my brain perked up at that and started humming busily. I have missed banana bread so much. Yes, bananas are part of the long list of foods that bother me in one way or another.

After a couple of batches and a little tinkering, I have come up with something that I like.


They do not taste like banana, but they have the texture and moistness of a banana muffin, and the coconut sugar and nectar give it a similar fruity sweetness. I made the final version this morning, and we like them!

Of course, a person could easily substitute honey and granulated sugar for the coconut sweeteners. They would still be quite tasty, but would lose the resemblance to banana. Molasses would also work well, and would probably make them reminiscent of bran muffins. In fact, that is an experiment that I will probably make myself, in the near future. I also miss bran muffins. :)

The other reason that I chose to use coconut sweeteners is that I'm trying to reduce the glycemic impact of my baked goods. Sugar is a deeply important part of the chemistry of baking. A person can't just yank out the sugar and expect the same results of texture and flavor. Coconut sweeteners do still impact blood sugar, but less severely than regular granulated sugar.

Muffins, in my world, fall into the same "happy comfort food" family that includes pancakes and cupcakes. There is just something about these foods that makes me happy. :)

"Everything-free" Not-banana Muffins
wheat-free, gluten-free, oat-free, egg-free, dairy-free, banana-free, soy-free, almond-free
 350 degrees - 18-20 minutes
12 muffins

Dry ingredients:
1 cup millet flour
1 cup tapioca starch
2 teaspoons coconut flour
1/4 cup flaxmeal
1/2 teaspoon xanthan gum
1/2 teaspoon salt
2 teaspoons baking powder
1 1/2 teaspoons cinnamon

Wet ingredients:
1 cup unsweetened applesauce
1/2 cup coconut nectar
1/3 cup light neutral oil (I used a light avocado oil)
1/3 cup coconut sugar
2 teaspoons melted coconut oil

Add in:
1 cup roughly chopped walnuts

Preheat oven to 350 degrees. Line muffin tin with baking cups. *
In a large bowl, combine all dry ingredients and whisk together well.
In a separate bowl, combine the wet ingredients.
   ~to melt the coconut oil, I scoop some into a small dish and heat it in the microwave.
    In our microwave, it only takes twenty or thirty seconds to melt this little bit of oil
Add the wet ingredients to the dry and stir to combine. When about halfway combined, add the walnuts. Stir until the ingredients just come together, with no more clumps of flour. Spoon or scoop into the prepared tin. I like to use a ice cream/cookie dough scoop for this.

Bake for 18-20 minutes. I have found that in our oven, 20 minutes is just a little too long.
Turn the muffins out onto a cooling rack. If they stay in the hot tin, the outside will continue to brown and will get tough.  Enjoy!

*I like to use the If You Care brand of baking cups. They're made from unbleached paper. I like knowing that they're free of chemicals, and they have a great added bonus. With regular muffin papers, the muffins often stuck to the paper and got torn apart when we tried to peel the paper off. With the If You Care brand, the papers come off neatly!

Friday, May 4, 2018

"Everything-free" Waffles!!! no wheat, no dairy, no eggs, no soy ~ just waffle-y goodness!


Waffles are a thing of beauty. <3

In the nearly eight years since learning I needed to give up wheat and eggs, I had not had a really good waffle. For several years, I have used a gluten-free baking mix to make waffles. They were pretty good, but not really good. "Good enough" is often what we settle for, in the world of food intolerances. Sometimes, I really want more than just good enough.

Last weekend, I started thinking about yeasted Belgian waffles. I did some research and cobbled together several recipes into something that I thought might work. I mixed up the batter and let it rise overnight. Here's what it looked like next morning:
So bubbly and alive! :)

I cooked up the yeasted waffles, and they got mixed reviews. Our daughter Anna and her sweetie Zach were here, and thought they were pretty good. My hubby Lee didn't care for them so much. The yeast flavor is very strong, almost like a strong sourdough flavor. I won't make them for my hubby again, BUT next time I'm visiting my sweet mama and she makes her amazing sourdough pancakes for people, I will definitely mix up some of this batter for myself! :)

That experiment launched me on a Week of Waffles!

The next morning, I worked out a regular baking-powder recipe for, as we call things, "everything-free" waffles. They were good! :)

Granted, it has been a long time since I ate a "real" waffle, but these made me pretty happy. Gluten-free things tend to be more hard/crunchy than crisp, but after a few minutes they did soften more toward a crisp texture. Outer crunch, soft and moist inside- yum!

In less than a week, I have made waffles four times. First, the yeast-raised batch, then variations on the baking-powder idea. I tried one using a can of full-fat coconut milk (pretty good), one with coconut milk beverage (the one I liked best), one using flaxmeal to replace the egg (more hearty, less even texture)...oh! I guess I've made them five times! This morning, I one made more batch, to re-test the version I liked best. :)

This post will have the baking powder recipe. I'll make a separate post about making flax gel for egg replacement, so it's easier to find, and another day I'll share the yeasted waffle recipe. Because I used (coconut) milk soured with an acid (lemon juice), these are more like a buttermilk recipe, so that's what I'll call them.

"Buttermilk" Waffles
In a large, square Belgian waffle maker, this makes 2 complete waffles, or 8 squares.
The recipe should double well; just don't quite double the salt. 

To:
1 cup alternative milk (I use Coconut Dream unsweetened original shelf-stable "milk")
add:
2 Tablespoons lemon juice
     (I've been using the kind from a bottle. If I wanted to make actual lemon waffles, I would go for
      fresh lemon juice, use more of it, and add some zest. With this amount of juice, the waffles don't
       taste of lemon to me, at all.)

Let the milk sit and "sour" while your mix up the rest of the ingredients.

Dry ingredients:
1 cup millet flour
1 cup tapioca starch
1 Tablespoon coconut flour
     (I feel this cuts down on the gummy feeling you can get with tapioca starch)
2 Tablespoons sugar (I've been using coconut sugar)
2 teaspoons baking powder
1/2 teaspoon xanthan gum
1/2 teaspoon salt
1/4 teaspoon baking soda
    (I've been taught that any time you use soured milk, you should add a little baking soda to work with it)

Whisk the dry ingredients together well.

Wet ingredients:
 1/3 cup oil (I've been using a light avocado oil. Any neutral oil will do.)
3 Tablespoons flax-gel egg replacer *I'll post separately about this

Whisk together the oil and flax gel, then combine with the soured milk.

Add the wet ingredients to the dry and whisk together well, until completely combined and smooth. With wheat flour, you'd have to be more cautious in mixing so the batter wouldn't be tough. Gluten-free flours are not so finicky.

Allow the batter to rest while you heat the waffle iron.

When the waffle iron is ready, spray the top and bottom surfaces with baking spray (or oil them, using a natural-bristle pastry brush). Plastic bristles melt. (voice of experience) I have had numerous struggles with gluten-free things sticking to hot surfaces. I oil before every batch, to save on frustration.

I use a large scoop to portion out the batter. (Ice cream scoop/dough scoop. It's the in the picture of the yeasted batter. I think it holds about 1/2 cup. I put one scoop on each square of the waffle iron.

Let the waffle bake, without peeking. If you try to lift the lid too soon, you'll tear the waffle to bits. (Learned from impatient experience!) :)

Most waffle makers have a light that turns on or off, to let you know when it's ready. Another way to tell is by watching how much steam is coming out. If large amounts of steam are still pouring out, leave it alone. When the steam gets noticeably less, it's time to start checking.

If you pull these out when they're too pale a gold, they'll have soggy bits. Leave them until they're a nice, solid golden brown color.

Any that we're not eating right away, we put on a cooling rack so they don't get soggy. They reheat well in a toaster. They would freeze well, too.

Enjoy!


Friday, April 27, 2018

Cinnamon Bit Fry-cakes


Really, these are pancakes, but "fry-cakes" is just such a fun word that I had to use it. ;)

Usually, I cook pancakes on our electric griddle, but yesterday I just didn't feel like clearing the space and hauling it out. I fried these up in a ceramic-lined non-stick skillet...and they were so good! <3
Funny that when I cook them on a griddle, they're "pan" cakes, but cooked in a pan, they have other names. Some people call them hotcakes or flapjacks. Because they had that delectable crunch from being fried in oil, "fry-cakes" just fit the best.

The cinnamon bits that I use are from the King Arthur Flour website. There are cinnamon chips available in some grocery stores, but I don't like them. To me, those just taste like Red-Hots candy; all heat and no real cinnamon flavor. They also usually contain trace amounts of dairy. The bits from King Arthur melt into pockets of delicious real cinnamon goodness when they bake, and they are now dairy-free! :)

Here's the link, in case you want to check them out:

 https://www.kingarthurflour.com/shop/items/cinnamon-sweet-bits

They also have these delicious things that they call "jammy bits," which are little gummy nuggets of fruit puree. When they're baked, they really do seem like little bits of real fruit jam. So good! :)

 https://search.kingarthurflour.com/search?p=Q&view=grid&deftab=products&w=jammy+bits

Okay, now to the recipe...

This is a work in progress, like all my recipes, but especially so since I just made them for the first time yesterday. They were so good, though, that I wanted to share them right away.

Cinnamon Bit Fry-Cakes
Makes about 12 - four inch cakes
Dry ingredients:
1 cup millet flour
1 cup tapioca starch
1 Tablespoon baking powder (I may try a little less, next time)
1 Tablespoon coconut sugar (other sugars would work fine; this is what I used and it was good)
1/2 teaspoon xanthan gum
1/2 teaspoon salt
1/2 teaspoon cinnamon

Wet ingredients:
1/2 cup unsweetened applesauce
1/4 cup oil (I used a mild avocado oil; any mild neutral oil will do)
2 teaspoons melted coconut oil
3/4 cup alternative milk (I use unsweetened original-flavor Coconut Dream coconut milk)

Add-in:
2 Tablespoons cinnamon bits from King Arthur Flour Company  

Combine the dry ingredients in a large bowl. In a smaller bowl, combine the wet ingredients. Add them to the dry ingredients and mix well. Stir in the cinnamon bits, then let the batter rest while you heat your skillet.

I used a ceramic-lined non-stick skillet. On our (glass-top) stove, I set the burner to medium at first, but turned it down about halfway through the batch.

Pour about two tablespoons of oil into your pan and heat on medium (or a little below medium) heat. To check if the pan is ready, drop a little bit of the batter into the oil. If the oil bubbles and sizzles around the edges, it's ready. Drop batter into heated pan carefully- about 1/4 cup batter per pancake. Flatten/spread slightly. Let them cook until the edges look set and the bottom is a nice golden brown. Flip and cook the other side, until it is also nicely browned and the cakes are cooked through. Add a little more oil to the pan for each batch. If the fry-cakes are getting too brown before the middle is cooked, lower the heat. If they take a super long time to brown, raise the heat.

With the "juiciness" from being fried in oil, I did not feel a need to butter these, but my husband liked them better buttered. Also, they were sweet enough that I did not want any syrup on them.

The cakes came out about 3 1/2-4 inches in diameter, and I ended up with about twelve cakes.

My mind is popping with other ideas, such as adding bits of walnut to these. Can't wait!

If you try them, please leave a comment and let me know how they turned out for you. :)

Thanks for stopping by!