Showing posts with label almond-free. Show all posts

Monday, August 24, 2020

"Everything-free" ~ "Buttermilk" Waffles (dairy-free + vegan + gluten-free)

 Happy National Waffle Day!


I celebrated by mixing up a batch of my "everything-free" waffles, and they were delicious! I am always tinkering with my recipes, aiming for the best possible texture and taste. This is a revised and updated version of the waffle recipe I shared before. 

These are crispy on the outside, moist and tender on the inside. My husband, who does not live gluten-free, enjoys them. They're not just "okay for gluten-free," but actually good, normal waffles. Enjoy!

"Buttermilk" Waffles  (vegan + gluten-free)

free of: dairy, eggs, gluten, soy, almonds, nightshades

Makes about twelve 3-4" waffle sections/ three batches in my waffle baker

*Make egg replacer ~ flax gel: 

Combine in a small saucepan~

1/3 cup water

1 teaspoon flax seeds

Bring to a boil; keep at a low boil for 1 minute. Strain gel into a bowl and let cool.

(the flax seeds can be saved & added to another meal, such as hot cereal or muffins, to boost nutrition)

*Make "buttermilk"

1 cup alternative milk (I use coconut milk- SoDelicious Unsweet Original coconut milk)

1 Tablespoon lemon juice  (doesn't need to be fresh- the bottled kind is fine)

Combine and let sit to curdle until needed


Dry ingredients: combine in large bowl and whisk thoroughly

2 cups gluten-free flour mix

~ I use 1 cup each of millet flour and arrowroot starch

3 Tablespoons coconut sugar

1 Tablespoon baking powder

3/4 teaspoon xanthan gum

1/2 teaspoon salt

(You can use another starch, like tapioca, but arrowroot seems to give a lighter texture)

(I'll be doing a post soon on different brands of millet flour and which I prefer)

Wet ingredients: combine in a small bowl

*the "buttermilk" mixture

*3 Tablespoons of the flax gel

1/3 cup neutral-flavored oil (such as canola or grapeseed)

1 1/2 teaspoons vanilla extract (optional, but yummy)

Stir or whisk to combine, then add to dry ingredients. Start mixing, then add:

1 teaspooon melted butter-flavored coconut oil

(If you add the coconut oil to the wet ingredients first, the cool milk will cause the oil to harden into little granules. It mixes in better if you add it after the milk is partly combined with the dry mixture.)

Continue whisking or stirring until well combined. You will be able to tell when the xanthan gum has been activated, as the batter will suddenly thicken. Let batter rest while the waffle iron heats.

Gluten-free batters are notorious for sticking, so I spray the waffle iron lightly with baking spray before every batch. Bake for 3-4 minutes, or until a nice golden brown. Remove to cooling rack, to keep them crisp. Store airtight in the refrigerator. I like to reheat mine in the toaster. The microwave doesn't revive the crisp like the toaster does. Use with 3-5 days.


Notes: 

-You can certainly use plain coconut oil, rather than butter-flavored. I just like the subtle flavor boost that the buttery kind gives. If you skip the coconut oil altogether, the waffles will tend to be more crunchy and hard, rather than crisp.

 -The xanthan gum is important. I know it's expensive to buy, but since you only use a tiny amount per recipe, it lasts a long time. Xanthan gum mimics gluten in baked goods, lending them structure. It is activated by motion and hydration. I whisk the dry ingredients together thoroughly, until I see the texture change. It's pretty interesting to see that shift. Once I add the liquid, I make sure to stir or whisk until the xanthan gum is further activated, and the batter thickens. You don't want to overmix, but that's  not as big an issue as it would be with gluten-bearing flours. Gluten-free flours are more forgiving.

-I use coconut sugar as part of my over-arching scheme toward lower-glycemic eating and fighting inflammation. Millet flour and arrowroot starch are resistant starches, and are supposed to be lower on the glycemic scale (meaning that they have a lesser impact on blood sugar levels). They are also, according to what I've read, non-inflammatory. Not that these waffles will not impact your blood-sugar at all, but the effect will be less than with standard flour and sugar. I rarely use any topping on them; just a bit of non-dairy butter substitute. They're so tasty that I rarely miss syrup. If I'm wanting that extra touch of sweetness, I'll drizzle them with a little bit of coconut nectar ~ also supposed to be lower on the glycemic scale, from what I've read.

-I use millet flour and arrowroot/tapioca starches...because they're the only ones my body will currently tolerate. Millet flour can be hard to find, but is often available from health food stores, and can be found online through Amazon. It's quite likely that other gluten-free flour blends would work well in this recipe, but I'm not able to test that theory as most of them contain things I can't tolerate. If you try a variation, I'd be interested to hear how it works out.


~ Thanks for stopping by and happy eating!


Saturday, May 12, 2018

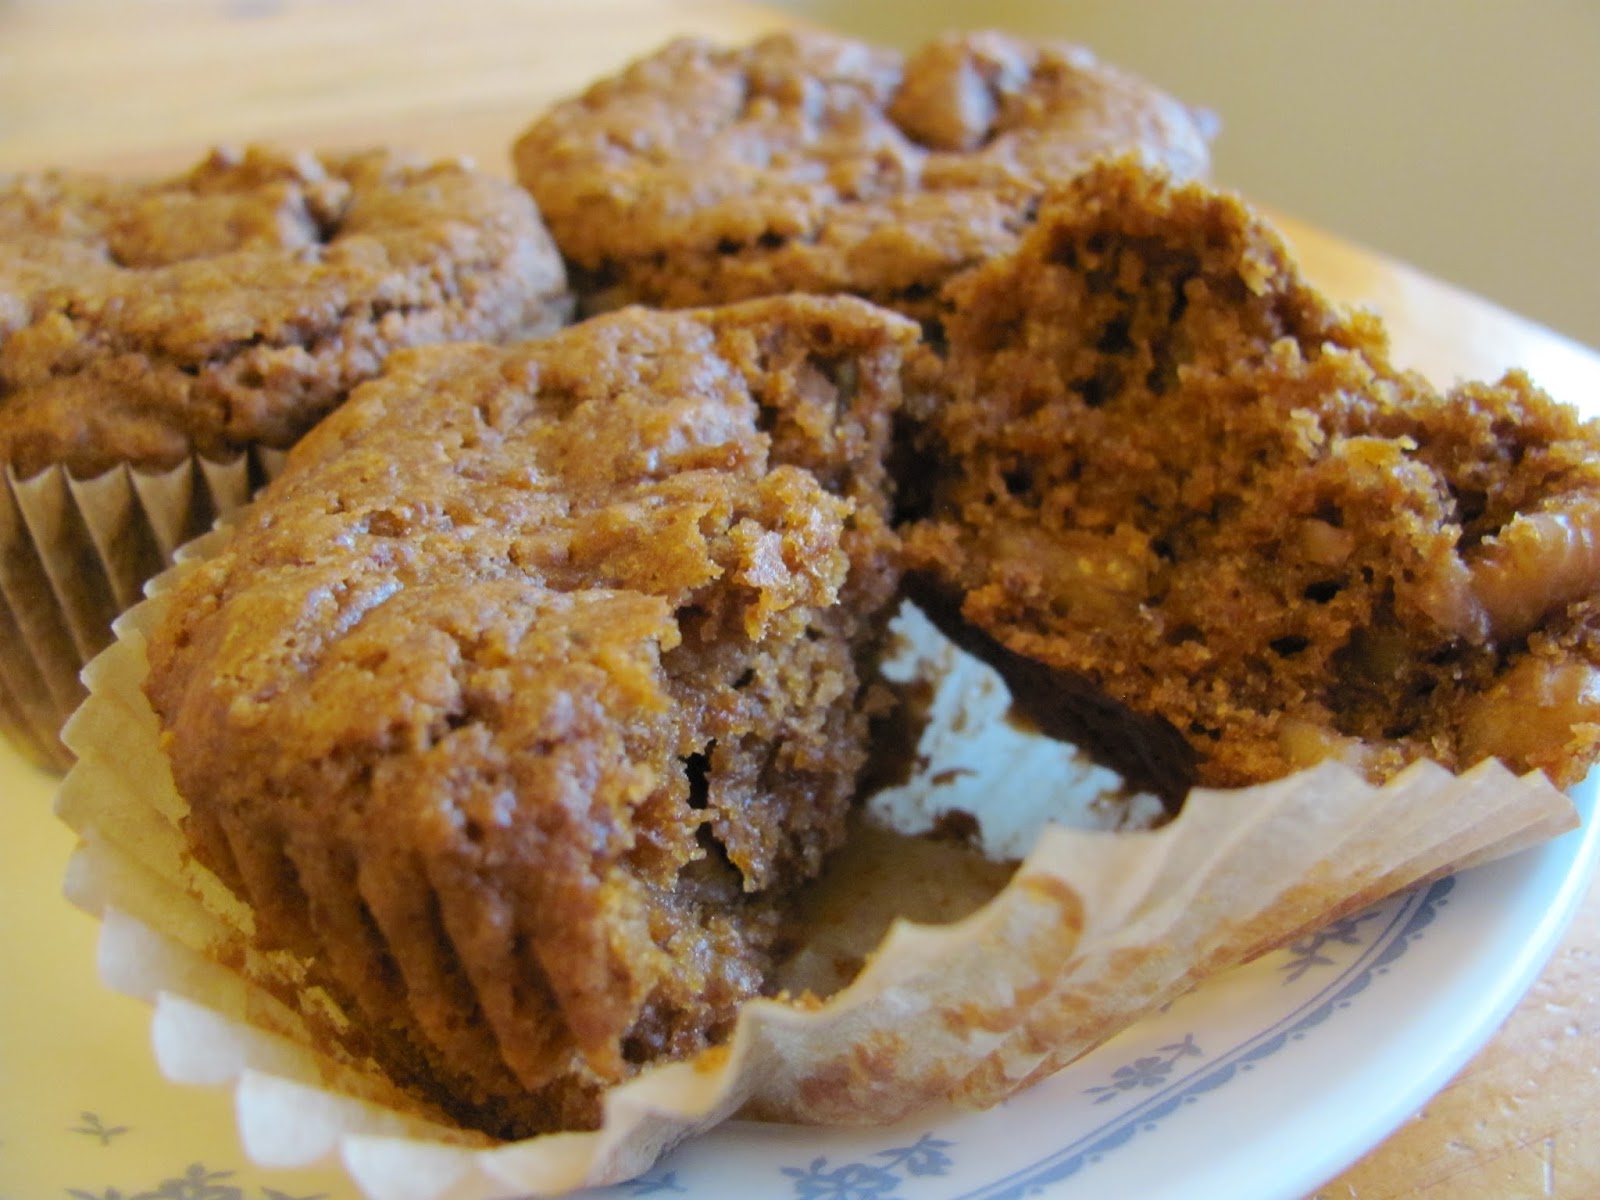
"Everything-free" Not-banana Muffins

"Everything-free" is our family's word for things that fit my food world. The list gets long- wheat-free, gluten-free, egg-free, dairy-free, soy-free, banana-free, almond-free, corn-free, potato-free, rice-free... Calling things "everything-free" just makes it simpler. :)

I have been working on my muffin recipes recently, trying to solve a problem. Since realizing that the butter substitute that I use has been bothering me, I have had to switch from a creamed solid fat method to using oil in muffins. The first result was that they all have a deep dip in the center. This is not a deal-breaker for eating them, but it does make them less attractive. To put a recipe out, without solving this issue, didn't feel right.

This specific recipe was born through a totally different experiment. I was making something else, and used coconut nectar as the sweetener. With the first bite, I thought, "This almost tastes like banana." The creative part of my brain perked up at that and started humming busily. I have missed banana bread so much. Yes, bananas are part of the long list of foods that bother me in one way or another.

After a couple of batches and a little tinkering, I have come up with something that I like.


They do not taste like banana, but they have the texture and moistness of a banana muffin, and the coconut sugar and nectar give it a similar fruity sweetness. I made the final version this morning, and we like them!

Of course, a person could easily substitute honey and granulated sugar for the coconut sweeteners. They would still be quite tasty, but would lose the resemblance to banana. Molasses would also work well, and would probably make them reminiscent of bran muffins. In fact, that is an experiment that I will probably make myself, in the near future. I also miss bran muffins. :)

The other reason that I chose to use coconut sweeteners is that I'm trying to reduce the glycemic impact of my baked goods. Sugar is a deeply important part of the chemistry of baking. A person can't just yank out the sugar and expect the same results of texture and flavor. Coconut sweeteners do still impact blood sugar, but less severely than regular granulated sugar.

Muffins, in my world, fall into the same "happy comfort food" family that includes pancakes and cupcakes. There is just something about these foods that makes me happy. :)

"Everything-free" Not-banana Muffins
wheat-free, gluten-free, oat-free, egg-free, dairy-free, banana-free, soy-free, almond-free
 350 degrees - 18-20 minutes
12 muffins

Dry ingredients:
1 cup millet flour
1 cup tapioca starch
2 teaspoons coconut flour
1/4 cup flaxmeal
1/2 teaspoon xanthan gum
1/2 teaspoon salt
2 teaspoons baking powder
1 1/2 teaspoons cinnamon

Wet ingredients:
1 cup unsweetened applesauce
1/2 cup coconut nectar
1/3 cup light neutral oil (I used a light avocado oil)
1/3 cup coconut sugar
2 teaspoons melted coconut oil

Add in:
1 cup roughly chopped walnuts

Preheat oven to 350 degrees. Line muffin tin with baking cups. *
In a large bowl, combine all dry ingredients and whisk together well.
In a separate bowl, combine the wet ingredients.
   ~to melt the coconut oil, I scoop some into a small dish and heat it in the microwave.
    In our microwave, it only takes twenty or thirty seconds to melt this little bit of oil
Add the wet ingredients to the dry and stir to combine. When about halfway combined, add the walnuts. Stir until the ingredients just come together, with no more clumps of flour. Spoon or scoop into the prepared tin. I like to use a ice cream/cookie dough scoop for this.

Bake for 18-20 minutes. I have found that in our oven, 20 minutes is just a little too long.
Turn the muffins out onto a cooling rack. If they stay in the hot tin, the outside will continue to brown and will get tough.  Enjoy!

*I like to use the If You Care brand of baking cups. They're made from unbleached paper. I like knowing that they're free of chemicals, and they have a great added bonus. With regular muffin papers, the muffins often stuck to the paper and got torn apart when we tried to peel the paper off. With the If You Care brand, the papers come off neatly!

Friday, April 20, 2018

Birthday Goodness (Vanilla Poppyseed Cake)

Birthday Goodness
*tiny miracle ~ I figured out how to add photos! :)

                                Vanilla Poppyseed cake with Caramel Orange Frosting

I am fifty years old today! I have actually been excited to reach this milestone birthday.
I simply love fresh starts and clean slates: new days, new years, and especially new decades. Stepping into a brand new half-century is, for most people, a once-in-a-lifetime event! :)

I usually bake my own birthday cake, because I love to do it. :)  It is part of the fun for me. I debated about what to bake this year. Should it be the moist chocolate cupcakes with chocolate frosting that received such a good response from my family? Or what about the lemon cupcakes with lemon "butter"cream that they liked even more than the chocolate?

Those are both delicious, but I think I want to try something entirely new.

.....hours later.... That's what I did! It turned out pretty well. I still need to fine-tune the frosting, but it was pretty tasty. :) In fact, I'm enjoying another piece as I write this. :) The cake is a good texture- moist and tender. It's not as light as a wheat-based cake, but a great improvement over some gluten-free cakes I've had. It received enthusiastic thumbs-ups from my hubby and our son this evening, and requests for second helpings. :)


Vanilla Poppyseed Cake (with Caramel Orange "Butter"cream Frosting)
 *gluten-free, dairy-free, egg-free, soy-free, vegan, etc. etc.

 **contains nightshades**
     I am just beginning the journey of learning to bake nightshade-free, so I don't have every recipe switched-over yet. This one starts with a mix that contains potato starch, and uses a butter-substitute that has pea protein in it. For those of you who have no trouble with those things, I hope you enjoy this bake. :)
  
 **Each Betty Crocker box mix makes one layer! This is important to know ahead of time. Given the cost of gluten-free mixes, I tend to opt for making one layer, then splitting and filling it. In our small rural town, each gluten-free mix costs around five dollars, which is more than double the cost of a regular cake mix. Since we've been cutting back on sweets, having a shorter cake works better for us anyway. We still get all the yum-factor, but end up only eating half as much cake. :)

Ingredients for the cake:
1 box Betty Crocker gluten-free yellow cake mix
1 stick Earth Balance soy-free butter substitute, softened
   (or 1/2 cup of the fat that works for you)
1 Tablespoon gluten-free vanilla extract
1 Tablespoon poppyseeds
1 Tablespoon melted coconut oil
1 Tablespoon flaxmeal
     (the brown type works fine, but I think the gold flaxmeal would be prettier in a light cake)
1/2 cup unsweetened applesauce
3/4 cup water

Preheat oven to: 350 (if using a shiny pan) or 325 (if using a dark or non-stick pan)

Prepare pan: lightly spray, oil or grease the bottom of the pan. I also cut a piece of parchment paper to fit the bottom. This helps reduce the chance of tearing chunks out of the cake when you take it from the pan later.

Combine all ingredients in a bowl and mix well. If using a hand mixer, the time suggested on the box should work well (a total of about 2 1/2 minutes). If you're using a stand mixer like a Kitchen Aid, it will probably take less time.

 *One of the benefits of gluten-free baking is that you don't have to worry about over-working gluten and toughening your finished product. I have learned, though, that over-mixing a gluten-free batter will put too much air into it, causing it to come out drier and more crumbly. Just beat the cake batter until it's nice and smooth. It will be noticeably thicker than usual cake batter.

Gently pour/scoop the batter into the prepared pan. You don't want to lose all the lightness you just beat into it, by being too rough at this point. :) Smooth out the surface of the batter and bake.

The box directions say to bake a 9x9 cake for 33-38 minutes. This will vary, depending on the altitude at which you live. If you have adjusted the temperature correctly for the type/color of pan you used, then the baking time should be close to what they suggest. I would check it a few minutes early, just to be on the safe side. (I used an 8x8 pan to bake my cake today)

Bake until the cake has started to pull away from the sides of the pan slightly, and a toothpick inserted in the middle comes out clean. If there is still gooey batter sticking to it, the cake needs more time. A gluten-free cake does not usually brown the same way a wheat-based cake does, but this one sure did. When this is done, it should be a nice golden brown color . If you press gently in the center, it should feel fairly firm. If it squishes, there's probably raw batter in the middle.

Let the cake sit in the pan for a few minutes, then turn it onto a cooling rack. If you used parchment paper, carefully peel it off. Let the cake cool completely before frosting.

Caramel Orange "Butter"cream Frosting
You can certainly make this just an orange frosting, which would be faster and easier. I do love the addition of the caramel, though. I used a homemade coconut-milk caramel. You may be able to find a ready-made dairy-free caramel, in larger towns than ours. Living in the "back of beyond," I am learning to make my own.

Here is what I did:
Coconut Caramel **totally dairy-free!!

**make ahead, so it's fully cooled when you use it

**be extremely careful when making caramel! Caramel burns are some of the absolute worst. It is like blistering-hot super-sticky glue. The only way to get it off is with very hot water, which would be agony on a burn. If I still had young kids at home, I would only do this when they were gone or sound asleep. You really have to give caramel close attention when it is cooking, and you really don't want any chance of tripping over a little person with a pan full of hot caramel! :)

1 can of full-fat coconut milk (the cans are usually around 15 ounces)
1/2 cup light brown sugar
1/4 tsp. sea salt or kosher salt
     I tried it with coconut sugar, and it worked pretty well. I do think it is better with a lighter sugar, 
      but it worked okay. With coconut sugar or dark brown sugar, you can't cook it quite as
     long as with a lighter sugar. It can easily taste a little burnt. I think that in future, I'll go back to
    using light brown sugar for this.

Put all ingredients in a small-to-medium, heavy-bottomed pan. Over medium-high heat, bring to a boil, stirring several times so the sugar dissolves. Reduce the heat to medium or medium-low, and cook until the mixture has darkened and reduced (thickened). Do not stir during the second part of the cooking.  The recipe I started with said to cook for 20-30 minutes. With the coconut sugar I pulled it off at a little over 15 minutes and it still seemed a little dark. So- if you use a darker sugar, expect it to be done much sooner.

I learned a secret for this process, from Mary Berry on the Great British Bakeoff. (I love that show!) She said to listen to caramel; that it is very noisy to start with but suddenly gets more quiet when it is ready. The change is not quite so obvious with alternative caramel, but still helpful to know.

Making the "butter"cream frosting:
**totally dairy-free, egg-free, gluten-free, etc. etc.
**does contain nightshades, if you use the Earth Balance

Ingredients:
1 1/2 sticks (3/4 cup) Earth Balance soy-free "buttery sticks"- softened
2 Tablespoons Spectrum palm-kernel oil shortening, softened
1 Tablespoon melted coconut oil
Zest of one medium-sized navel orange
1/2 cup-2/3 cup coconut caramel
1/2 teaspoon gluten-free vanilla extract
a pinch of sea salt

(I added several tablespoons of fresh orange juice, with was tasty, but made the frosting separate a bit. I then added a couple of tablespoons of tapioca starch, to counteract the splitting. It worked fairly well. In future, I'll try it with just the zest and see how that goes. This batch tasted good, but the texture might have been slightly better without the juice)

-Powdered sugar ~ probably about 2 cups
    Most buttercream recipes call for at least 4 cups of powdered sugar. The result is far, far too sweet
    for me! I always use much less. It can be tricky finding the right balance, so it doesn't seem like
    you're just eating sweetened shortening. I start with about 2 cups, beat it in, then taste. If you want
    it sweeter, add 1/4 cup powdered sugar at a time, until it hits the right balance for you.

**There are several organic powdered sugars out there. For our corn-free daughter, we find one of
the few organic brands that is also free of corn-starch. These tend to clump, so it's best to rub the
powdered sugar through a sieve before adding it.

The warm coconut oil and soft fats can make this pretty soft. Once it's beaten together, you can refrigerate it for a half hour to an hour, until it's a good consistency. If you want a lighter texture, you can beat it again once it has firmed up. If it gets too hard, just let it sit out at room temperature for fifteen minutes or so, until it's the right consistency for you.

For this cake, I just sliced it horizontally, spread a layer of frosting, added the top layer and spread frosting over the top. If I had wanted to do some decorative piping, I would have chilled the frosting again until it was a better consistency for piping.

I hope you enjoy experimenting with this! :)